Setup a Multi-Cluster CDN with Kubernetes Cloud Manager in 10mins
The beautiful thing about technology and innovation is that it compounds. Things that used to be hard, resource intense, or unfeasible, become simple, affordable, sometimes trivial to implement, when a new paradigm shift and technology wave comes along and matures. So is the case with cloud computing and large-scale distributed systems. Kubernetes runtime, tools like Cloud Manager, and the multitude of cloud providers, makes setting up a multi-cluster, multi-region, distributed infrastructure no more painful to pull out than a morning exercise.
This is your morning exercise today: setup a multi-cluster CDN for serving static web resources — say, for your family business website, or your company new product landing page. It has to be fast and responsive, low-latency to load, and scale out as much as needed. Setting up multiple clusters in multiple regions, preferably from different cloud providers, goes a long way to achieve these goals. And because you need to focus on your main business of the day, you should get done with it in no more than a few minutes. Maybe to be done while taking a coffee-break…
Let’s get started, to see if it can be done before coffee gets cold.
The Steps
Here is a quick summary of the steps – no more planning is needed:
- Create 2 (or +) Kubernetes clusters, in 2 (or +) cloud providers (1min/cluster)
- Launch Cloud Manager with Docker (1 line) or Helm (4 lines)
- Import the clusters into Cloud Manager (30sec/cluster)
- Define your DNS Domain, TLS secured with a free ACME certificate. Configure your DNS server to hit the clusters. (2+1min)
- Deploy a Nginx HTTP server in each cluster (1min/cluster)
- Upload the HTML+CSS+JS pages and resources (2min)
- Check that the pages are working for all the clusters (10sec/cluster)
- Done! Send an email to your family, boss, or marketing team, and invite them for a coffee. You still have a couple of minutes left.
You may be a little incredulous that you can pull this off in 10mins or so. As always, it dependents on experience… Remember when you first started typing in a computer keyword?!
Create the Clusters
Let’s go low cost! You family and boss will appreciate that. Let go with DigitalOcean and Linode. Assuming you already have an account in both of these providers, click Create new Kubernetes cluster on each console. Pick you preferred regions. Let it run in the background while the clusters are being provisioned – you are in a worry and way too busy to wait. Create and grab one Personal Access Tokens in each provider (API > Tokens/Keys in DigitalOcean, MyProfile > ApiTokens in Linode). (Save the tokens in a .txt file if you close the web browser tabs showing the tokens.)
Launch Cloud Manager
Lunching Cloud Manager is the easy part. Which part is hard?!? If you have Docker installed in your laptop, lets go with that. Copy&paste and run the command-line below:
docker run -p5005:2500 einnovator/einnovator-devops cm -d
This runs the latest version of Cloud Manager in a docker container named cm. Open the web browser in URL http://localhost:5005 to access the console and get started. You are asked to setup the admin account. Type admin as username, admin123 (or your favorite) as password, and type your email (case you forget the pass).
Alternatively, if don’t have Docker, no worries. You already have a couple of Kubernetes clusters (you just create them 1min ago, remember?!), so you can deploy Cloud Manager to one of these cluster using Helm. If you don’t have Helm installed, check the instructions. Download the cluster YAML config file from the provider console, and drop it in folder .kube/ under your home folder. Rename or save the config file as config. Run the commands:
helm repo add ei https://cdn.einnovator.org/charts
helm repo update
kubectl create ns devops
helm -ndevops install cm ei/einnovator-devops
This create a new Helm release with name cm. Installation is done in newly created namespace devops. To expose the installed service, there are several possibilities. The simplest one to get started is to use kubectl port-forward:
Linux/MacOS:
export POD_NAME=$(kubectl get pods -ndevops -l "app.kubernetes.io/name=einnovator-devops,app.kubernetes.io/instance=cm" -o jsonpath="{.items[0].metadata.name}")
kubectl --namespace test port-forward $POD_NAME 5000:80
WindowsOS:
kubectl get pods -ndevops -l "app.kubernetes.io/name=einnovator-devops,app.kubernetes.io/instance=cm" -o jsonpath="{.items[0].metadata.name}" > sso-pod.txt
set /p POD_NAME = < cm-pod.txt
kubectl -ndevops port-forward $POD_NAME 5000:80
Import the Clusters
Importing the clusters it’s now a few clicks way. In Cloud Manager console, click Clusters > Add New > Import. Select the provider, and enter the Personal Access Token you just grabbed. You should see the cluster listed. Click to select. Click to create. Repeat for the other cluster. Confirm that all is good, and the cluster dashboard shows the node list (at least one node should be there).
Once the clusters are imported, create two Spaces, one in each cluster, by clicking Spaces > Add New. Name them cdn1 and cdn2. This is where you are going to deploy your HTTP servers.
Setup DNS Routing
Setting up DNS routing use to be the tricky part. Not any more! Click Domains > Add New. Type your domain name, say: fastk8s.com. Select option Sub-domains and TLS > Custom Certificate. Click Request Certificate > Submit, to get a free Let’s Encrypt certificate issued via ACME protocol. Copy&paste the challenge, and create a TXT DNS record with name _acme-challenge.fastk8s.com and the challenge as value. You own this DNS domain, right!? So you should have access to a web console to add new records to the DNS domain configuration. Click Confirm, and Save. Always important!
Go back to the Cluster dashboard again or the provider console, and copy&paste the public IP address of the cluster load-balancer. Say, xx.xx.xx.xx is public IP for cluster 1 load-balancer, and ww.ww.ww.ww is public IP for cluster 2. Create a A record in your DNS config for each of these IPs: A cdn1.fastk8.com xx.xx.xx.xx and A cdn2.fastk8.com ww.ww.ww.ww. This ensures that traffic is routed to your clusters.
Deploy Nginx HTTP Server
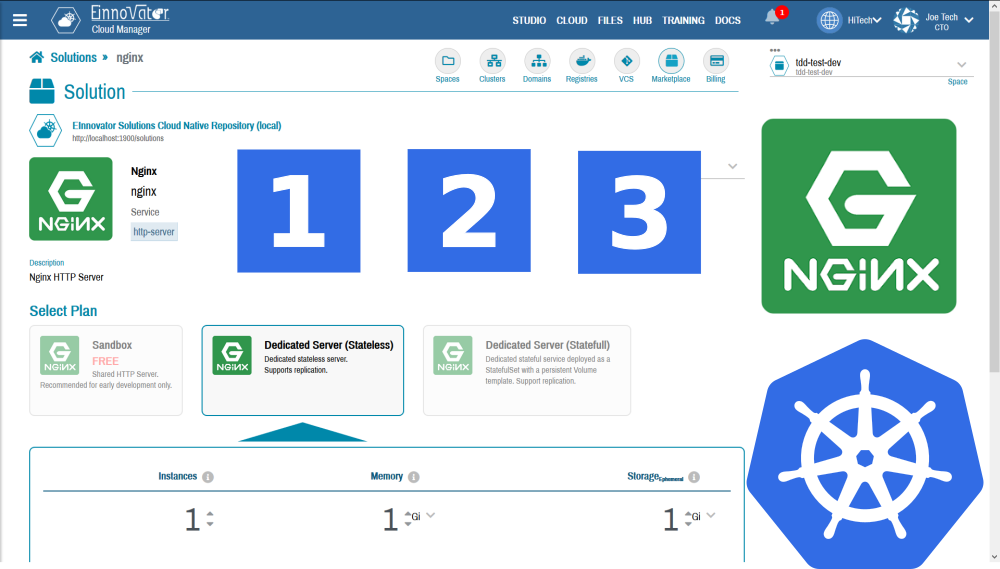
You need a HTTP server, and Nginx is nimble and fast, so keep it simple and go with it. Click Marketplace to list the solutions available on the pre-configured Catalog. Select the Nginx card. Customize with 64Mb to 128Mb of memory. Nginx is light-weighted, no need for more. If you want to scale big, select more than one instance. Click Install. Name you deployment as cdn1, to stay consistent with the plan. Select the space cdn1, and for hostname call it also cdn1. Click Install again. Confirm that Nginx is deployed.
Go to tab Routes on the deployment dashboard, and click View App. You should see the famous Nginx whitelabel landing page. Repeat the install, this time for space cdn2 with hostname cdn2.
Upload Pages and Resources
You are almost there, one major step to go. Uploading the HTML+CSS+JS pages with the juice that some brilliant web-designer handed over to you. (Or you did yourself, if you are one the rare “specimens” called by science full-stack developer). Three options here. Pick the best. In the Nginx deployment dashboard, select the Instances > Files tab:
- If your have a single HTML magic page, edit the
index.htmlfile directly and copy&paste the new file content and save. - You have a few HTML+CSS+JS files, but not too many, upload each of them separately. Make sure the landing page is called
index.html. - You have a full-blown website in some GIT repository. Click
Upload Repoand enter the URL of the git repository. This will copy the files from the repo toNginx. (If the repo is not public, you need to setup the VCS credentials as well.)
Repeat the upload for cdn1 and cdn2. If you selected multiple replicas, you need to perform the upload of the file(s) to each individual replica separately. Use the Pod selector in the file-manager of Cloud Manager for this. (If you had a cluster with a distributed filesystem, this would have been automatic. But that’s a morning exercise, for another day.)
Check The pages
Click Route > View App for each Nginx deployment and confirm that your website is ready and available in: cdn1.fastk8.com and cdn2.fastk8.com. To load-balance between the two cluster in the CDN, you can use different approaches, but DNS is the simplest. Configure DNS with multiple records with same name (e.g two CNAME cdn.fastk8.com records, with values cdn1.fastk8.com and cdn2.fastk8.com).
Done
Done, is Done! You have completed all the required steps to make your family and company business go public — hopefully in less than 10mins. If you stumbled in any of the steps, it’s probably because somebody or something distracted you from your morning routine.
What about next?! Depends on you… what do you want to do with the rest of the day?!

Comments and Discussion