Deploying Java/Spring Apps to Multiple Clouds with Kubernetes Cloud Manager
Being able to deploy applications and workloads to multiple clouds easily gives you flexibility and freedom-of-choice. You can avoid cloud vendor lock-in, continuously shop for low-cost infrastructure, migrate workloads and data at will, and stay in full-control in face of changing provider policies and ad-hoc decisions. At the engineering level, there are also benefits of implementing multi-cluster and multi-cloud approach to development and operations. It increases the reliability and scalability of your systems, promotes good architectural design practices, and reinforces a portability mindset.
In general, to be truly multi-cloud ready you need two things: use tools and runtimes that give you a uniform approach to deploying and managing workloads across different clouds; and minimize or isolate the dependencies on provider specific services (e.g. by using portable middleware services that can be deployed in any cloud, and/or by using intermediate layers that hides provider specific APIs). In this article, I will focus on the first of these requirements. Specifically, I will show how deploy and configure a Java/SpringBoot application in multiple clouds easily and in a completely uniform way using Kubernetes Cloud Manager PaaS.
Tools of the Trade
The App
The first step in a multi-cloud endeavor is to have an application to start with. If you already have a web application with a Java backend, then you can use it as you follow the hints and steps I present below. If you don’t, then you have at two options: use a sample project build by somebody else, such as one the samples or MVP projects in EInnovator’s Startup Factory catalog – MVP/Samples Catalog, or create a new project with a quick-wizard such as Spring Boot Initializer.
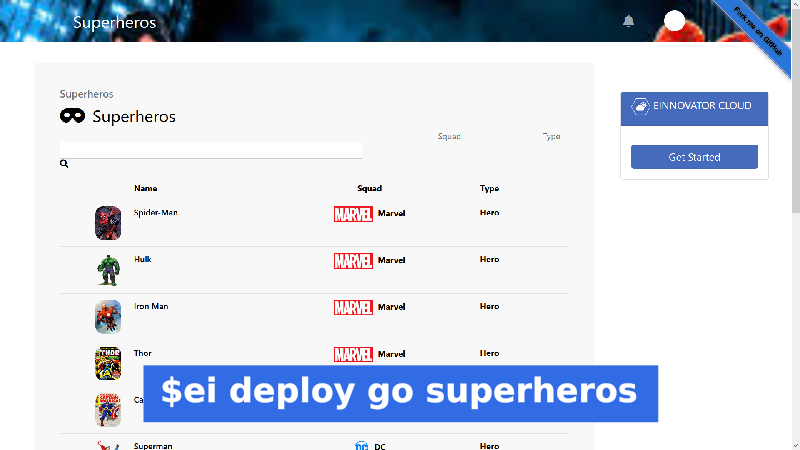
In the examples below, I use the sample app Superheros, whose source code is available in a public GitHub repository with Apache license, and pre-build in a DockerHub image repository. For your own application, I assume that you have a Docker image. If you don’t, check out this article I posted earlier to see how you can build a Docker image for your Java/Spring application inside Kubernetes with a CI/CD pipepline.
Spinning Kubernetes Clusters
Since our goal is to deploy an app to multiple clusters in multiple cloud providers, an obvious next step to is to provision the clusters. There are plenty of cloud providers these days that allow you to spin a Kubernetes cluster at a press of a button. For low-cost experiments and operations I suggest DigitalOcean, Linode, and/or Scaleway, or alternatively to benefit from the free trial-period offered by some other providers, you may consider: GCP, AWS, Azure, IBM, and Oracle.
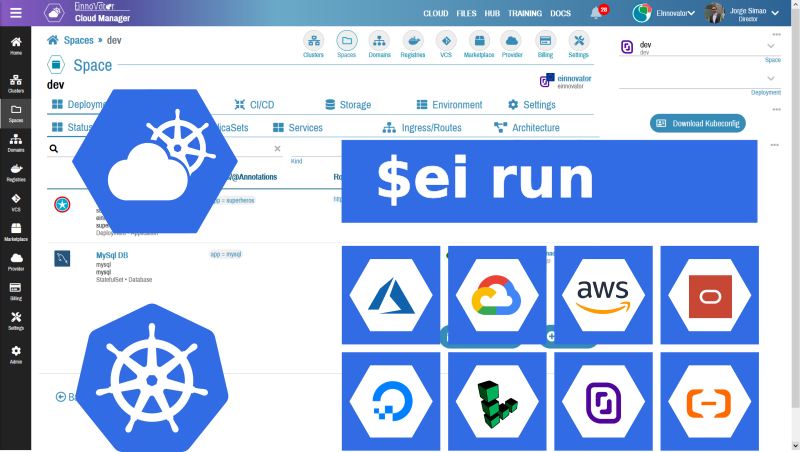
The UX/UI details how to provision a cluster depend on the provider. The end result should be same though — you will have a Kubernetes cluster with one or more VMs/nodes available to deploy applications. For each cluster, download the kubeconfig configuration file and save it in your local file-system each with a different filename. This is a YAML file describing the master server URL and the access credentials to the cluster. A variety of tools can use this file, including: kubectl (Kubernetes native CLI) and ei (Kubernetes Cloud Manager CLI), or you can uploaded into Cloud Manager UI.
Alternatively, you can provision the clusters from the UI of Cloud Manager. This has the advantage of using the same UX/UI and a uniform approach to provision clusters across providers. You only need to enter the credentials for each of the providers you are using (e.g. a personal access token for DigitalOcean, Linode, Scaleway, a key-secret pair for AWS, a service account JSON for GCP, etc.). You can also download the kubeconfig configuration file from Cloud Manager menu option Cluster > Connect > Kubeconfig.
If you have already an existing cluster in any of these providers or on-premises you can use it as well. Additionally, if you have Docker Desktop installed in your laptop, you can use it as a Kubernetes pseudo-cluster with a single node for development purposes. The main limitation of this last option is that your laptop typically does not have a public IP, so DNS round-robin load-balance will not work for this cluster (discussed below).
Starting Cloud Manager Backend
We will use the ei CLI tool throughout this article, but before that you need to have an instance of Cloud Manager service running. If you want to use Cloud Manager in multi-user mode, you need also to start the SSO Gateway service. I have covered the details of this in other articles, so I direct you to one of these. You can also find the links to the documentation in the references at the bottom.
Cloud Manager is packaged as a Docker image, and several installation options are possible, including: with kubectl, docker, helm, and helper scripts for multi-user mode (based on YTT). For quick reference, I show below the command to run Cloud Manager in single-user mode with Docker.
docker run -p5005:2500 einnovator/einnovator-devops cm -d
Open Cloud Manager UI in a web browser in http://localhost:5005 and signup as admin.
Alternatively, you can use the EInnovator installation of Cloud Manager (SaaS) available in cloud.einnovator.org. You only need to register, and remember your username/password.
Installing Cloud Manager CLI
The next step in the setup is to install the ei CLI tool. In other article, I give a deep introduction to the CLI tool. In a nutshell, to install you need to download a .tgz as follows:
wget https://cdn.einnovator.org/cli/ei-latest.tgz
tar -xf ei-latest.tgz
cd einnovator-cli
chmod +x ei #linux/mac only
./ei
Finally, you need to login into the server with the CLI using your username and password. Use the appropriate API endpoint: localhost:5005 if running on Docker, cloud.einnovator.org if using the EInnovator’s SaaS installation.
# login to local cloud manager API with username/password
ei login -u username -p password http://localhost:5050
# login to remote SaaS installation of cloud manager
ei login -u username -p password https://cloud.einnovator.org
Setup the Clusters
Importing Kubeconfig
You can import cluster access details into Cloud Manager in several ways, including the UI and the CLI. The easiest way with the CLI, is to use command cluster import with option -f to specify the location of the kubeconfig file of each cluster. You can import as many clusters as you want, from any number of providers. The format of kubeconfig is always the same. The cluster name (and provider details) are inferred automatically from the kubeconfig file. The only restriction, is to use kubeconfig files with configuration for a single cluster. (If multiple clusters are defined in a single file, you need to specify the name of the selected cluster as argument of cluster import command, otherwise the first cluster found is imported).
Below, I import several clusters from different cloud providers as example. You should adapt to the actual providers and filenames you select.
# import clusters using kubeconfig files
ei cluster import -f kubeconfig-digitalocean.yaml
ei cluster import -f kubeconfig-linode.yaml
ei cluster import -f kubeconfig-scaleway.yaml
ei cluster import -f kubeconfig-gcp.yaml
ei cluster import -f kubeconfig-aws.yaml
ei cluster import -f kubeconfig-azure.yaml
ei cluster import -f kubeconfig-ibm.yaml
ei cluster import -f kubeconfig-oracle.yaml
ei cluster import -f kubeconfig-alibaba.yaml
To confirm that the clusters where imported you can use command ls -c.
# list configured clusters
ei ls -c
Additional Cluster Setup
There are a few add-ons/extensions and tools that are often useful or needed when setting up a Kubernetes cluster and using it in practice. This include an ingress controller* to manage Ingresses and support DNS routing, such an Nginx. A CI/CD enabling runtime, such as Tekton. And tools to install marketplace solutions in the cluster from within the cluster, such as helm and kubectl. Cloud Manager gives support to install these runtime extensions easily. This can be done in a single step during the cluster import using options --ingress, --cicd, and --tools. If some of your clusters already have these runtimes installed you can omit some these options (e.g. Scaleway UI and API has an option to install an ingress controller at cluster creation time). Below, I show again the import commands modified to install the Nginx ingress controller (the default), which is needed later. The helm tool is also installed.
# import clusters and install add-ons
ei cluster import -f kubeconfig-digitalocean.yaml --ingress=true --tools=true
ei cluster import -f kubeconfig-linode.yaml  --ingress=true --tools=true
...
Creating Spaces
Next, you need to create a Space (namespace) in each cluster to deploy your application and support resources. This is done with command space create. Cloud Manager provides a flat space list, to allow selecting and switching between spaces in different clusters and clouds with the same ease as spaces in same cluster or cloud. The cluster name is used as prefix when naming spaces.
Below, I create a space named dev in each of the cluster we have imported. We can use different space names in different cluster, but using a common name simplifies scripts and make it easier to manage.
# import clusters using kubeconfig files
ei create space do/dev
ei create space linode/dev
ei create space scaleway/dev
ei create space gcp/dev
ei create space aws/dev
ei create space azure/dev
ei create space ibm/dev
ei create space oracle/dev
ei create space alibaba/dev
If you have many clusters, you may prefer to use a Bash shell script with a for loop instruction, as follows:
export SPACES="do/dev linode/dev scaleway/dev gcp/dev aws/dev azure/dev ibm/dev oracle/dev alibaba/dev"
for space in $SPACES ; do ei create space $space; done
TIP: You should adapt the value of the SPACES variable to the actual clusters you provisioned.
To confirm that the spaces are create in all clusters use command ls.
# list created spaces
ei ls
Running the App across the Clusters
Deploying an application can be done in a single step with command run. This should be done for each cluster/space. Command cd is used to switch between clusters/spaces.
# run app as a deployment with a specified image in multiple cluster/spaces
ei cd do/dev
ei run superheros einnovator/einnovator-sample-superheros --port=80 --stack=boot -o
ei cd linode/dev
ei run superheros einnovator/einnovator-sample-superheros  --port=80 --stack=boot -o
....
The option --port in command run is used to specify a port where the application container should be listening for connections. The option --stack=boot hints Cloud Manager to configure some environment variables of the application automatically for a Spring Boot app — namely, the environment variable SERVER_PORT is set to configure the port of the embedeed HTTP/Servlet container. The end result is that a Kubernetes Deployment and Service is created, together in the respective ReplicaSet and Pod(s). Some of deployment meta-data is also kept in Cloud Manager DB, which allow to stop the application in the cluster without lossing the configuration.
If you have many clusters, a Bash shell script is again handy:
for space in $SPACES ; do ei cd $space; ei run superheros einnovator/einnovator-sample-superheros --port=80 --stack=boot; done
Rather than explicitly change current space with command cd every time you need to deploy or configure an application in a different cluster/space, you can use option -n to select the cluster/space. As follows:
# run app as a deployment with a specified image in multiple cluster/spaces
for space in $SPACES ; do ei run -n=${space} superheros einnovator/einnovator-sample-superheros --port=80 --stack=boot; done
To confirm that the application is running use command ps.
# list deployments in current space
ei cd do/dev
ei ps
...
If you want to list the deployments in other clusters/spaces rather than the current one, use option -n. You can also specify multiple spaces and clusters comma separated.
# list deployments in selected space
ei ps -n=do/dev
ID    NAME         DISPLAYNAME   KIND          STATUS    AVAILABLE   DESIRED   READY   AGE
587   superheros   superheros    Deployment    Running   1           1         1/1     1d
# list deployments in several spaces
ei ps -n=do/dev,linode/dev,scaleway/dev,aws/dev
Alternatively, use one of the two Bash command lines below to list for all clusters/spaces:
# list deployments in all spaces
ei ps -n=${SPACES//[ ]/,}
# list deployments in all spaces
for space in $SPACES ; do ei ps -n=${space}; done
TIP: The syntax ${string//[substring]/replacement} is Bash idiom for string replacement. Here used to replace the whitespace/blank separators in variable SPACES by commas.
If you want to quickly navigate to Cloud Manager UI, you can use command deploy view. This opens a window/tab in the default web browser with the application dashboard (you need to login first time). This is convenient to troubleshoot the application deployment in a neat visual way (e.g. by looking at the logs, events, generated manifests, configuration, and other resources). Likewise, you can used command space view to open the dashboard of current space.
#open app in browser
ei cd do/dev
ei deploy view superheros
...
To opens browser tabs with the application dashboard for all clusters/spaces, you can use the script line:
for space in $SPACES ; do ei deploy view superheros -n=$space; done
App Management and Configuration
Scaling the App
If you want to have more than one instance of the app in each cluster you can use option -k in command run. Alternatively, you can use command deploy scale after the app is already running.
# scale deployment to 10 replicas (horizontal scaling)
ei cd do/dev
ei deploy scale superheros 3
ei cd linode/dev
ei deploy scale superheros 5
...
To scale the resources allocated (memory, ephemeral disk storage, and CPU share) to each instance use command deploy resources.
# update resources (vertical scaling)
ei cd do/dev
ei deploy resources superheros --mem=2Gi  --disk=3Gi
ei cd linode/dev
ei deploy resources superheros --mem=2Gi  --disk=3Gi
...
Updating the App
If at some point you need to update an application image:version, you can use command deploy update with option --image, as follows:
ei deploy update superheros --image=einnovator/einnovator-sample-superheros:1.1 -n=do/dev
ei deploy update superheros --image=einnovator/einnovator-sample-superheros:1.1 -n=do/linode
...
To update across all clusters/spaces easily use the command-line:
for space in $SPACES ; do ei deploy update superheros --image=einnovator/einnovator-sample-superheros:1.1 -n=$space; done
Environment Variables
You may need to setup the environment variables of the application to configure different settings. This can be done with commands env add, env update, and env rm. To check the current environment of the application use command env ls. You need to restart the application after the updating the environment variables with command deploy restart.
ei cd aws/dev
ei env add superheros SPRING_PROFILES_INCLUDE=mongodb
ei env update superheros THEME=fantasy
ei env rm superheros BROKER_URL
ei env ls
ei deploy restart superheros
...
As usual, you can rely on Bash scripts to more easily configure applications across all clusters/spaces:
for space in $SPACES ; do\
	ei cd ${space};\
	env add superheros SPRING_PROFILES_INCLUDE=mongodb;\
	env update superheros THEME=fantasy;\
	env rm superheros BROKER_URL;\
	deploy restart superheros;\
done
Persistence
Up until now, I’ve assumed that the application is running with an embedded database. This is true by default for the sample application einnovator/einnovator-sample-superheros used as example throughout this article. In a later section, I discuss some approaches to deploy standalone databases and to bind applications to databases.
For an embedded database, you may want to consider that disk space for a Kubernetes pod is by default ephemeral (i.e. it is discarded if the pod is terminated, say when the application is shutdown or updated). To have true persistence storage, you can configure a mount point for the application with command mount add. Cloud Manager automatically creates a Kubernetes Persistent Volume Claim, and generates the manifest file to mount it in the specified path. You need to restart the application for the mount to take effect. And you need to do it in each cluster/space.
# mount volume in specified path
ei cd do/dev
ei mount add superheros data --mountPath=/data --size=3Gi
ei deploy restart
...
If using a Bash script to configure for all clusters/clouds:
for space in $SPACES ; do\
   ei cd $space;\
   ei mount add superheros data --mountPath=/data --size=3Gi\
   ei deploy restart\
done
Accessing the App with DNS Routes
Defining a Domain
To make the application accessible in each cluster you have several options. The most convenient for end-users, is to have a DNS host name for the app. This assumes the nodes in your clusters have a reachable public IP. To do this in Cloud Manager, start by defining your domain name (e.g. acme.com) with command domain create. For secure HTTPS access, you need to have a file with a certificate, and corresponding private key and certification authority chain, and specify these with options --crt, --key, --ca.
# create an (unsecure) domain
ei domain create acme.com

# create a secure domain
ei domain create acme.com --crt=crt.pem --key=key.pem --ca=ca.pem
To make this the default domain going forward, use command domain set. You only need to do this once, as the domain is managed by cloud CloudManager and can be used for all clusters. You can use command ls -d to list all domains (if you have more than one).
# set current/default domain and list domains
ei domain set acme.com
ei ls -d
Adding DNS Routes
Next, you should add one or more DNS routes to the application in each cluster with command route add. When a route is added, Cloud Manager creates automatically a Kubernetes ingress and configures a secret with the domain certificate.
We will add two routes, one to uniquely identify and reach a specific cluster (i.e. cloud provider installation), and a shared one that can be load-balanced globally (see next section). Below, I use heros as the common host name, and heros-{cluster} for the cluster specific route.
# add routes to app
ei cd do/dev
ei route add superheros heros-do
ei route add superheros heros
ei cd linode/dev
ei route add superheros heros-linode
ei route add superheros heros
...
If using a Bash shell script:
for space in $SPACES ; do ei cd $space; ei route add superheros heros-${space%/dev}; ei route add superheros heros; done
TIP: The expression ${space%/dev} is Bash idiom to remove the suffix /dev from a string. Used here to get the cluster name from the qualified space name.
You also need to configure your DNS server to route to the application DNS host name. Do this by creating A records for heros-{cluster}.domain (e.g. heros-do.acme.com, heros-linode.acme.com, etc.) with value the public IP address of a node in the cluster. To get this IP addresses, you can run command node ls -b and take notice on the value of field addr. Identify the public IP address (the private IP address typically starts with 10.x.x.x, so it is the other one). You can also used kubectl get nodes -o=yaml to get this information.
ei cd do/dev
ei nodes ls -b
Once the route is added, you can navigate to the app quickly with command deploy go. This open a browser window (or tab) in the application home page.
#open app in browser
ei deploy go superheros
Load-Balancing Across Clusters/Clouds
Often, it is convenient for end-user to access the application using a single DNS hostname.domain address even it there are multiple instances/replicas of an application. For the instances running in the same cluster and space, Kubernetes take care of this automatically, by load-balancing traffic across the different instances. If the app is replicated across multiple clusters and clouds, like we are doing here, we need to have an additional mechanisms to perform the load-balancing across the clusters. The simplest way to do this (not necessarily always the ideal), is use DNS round-robin by configuring multiple A records with same host name but with multiple values for the IP address. Below, I show an example configuration for heros.acme.com:
A heros.acme.com 51.15.220.42 #do
A heros.acme.com 71.12.120.22 #linode
A heros.acme.com 91.14.142.14 #scaleway
...
Complete Script
For reference, I show below the complete Bash script to deploy the application in multiple cluster/clouds, including: space creation, run and scale deployments, create domain and routes.
export SPACES="do/dev linode/dev scaleway/dev gcp/dev aws/dev azure/dev ibm/dev oracle/dev alibaba/dev"
for space in $SPACES ; do ei create space $space; done
ei domain create acme.com --crt=crt.pem --key=key.pem --ca=ca.pem
ei domain set acme.com
for space in $SPACES ; do\
  ei cd ${space};\
  ei run superheros einnovator/einnovator-sample-superheros--port=80 --stack=boot;\
  ei deploy resources superheros --mem=2Gi --disk=3Gi;\
  ei deploy scale superheros 3;\
  ei route add superheros heros-${space%/dev};\
  ei route add superheros heros;\
done
If you want to do a clean-up of all resources all across all clusters/spaces, you can run this script:
export SPACES="do/dev linode/dev scaleway/dev gcp/dev azure/dev ibm/dev oracle/dev alibaba/dev"
for space in $SPACES ; do ei cd ${space}; ei kill superheros -f; ei space rm ${space}; done
Running the App with a Backend Database
For most applications, it is preferred to connect to a standalone database rather than using an embedded database. This requires two steps: deploy the database, and configure the app to connect to it. In general, you will need to evaluate between several possible architectures to distribute the data across the clusters. I summarize below some key questions and possibilities:
- Which database to use ? Is a RDBMS or NoSQL preferred for my use case�?
- Decide if the DB will be replicated or a single instance is good enough ?
- If there is a single instance:
- Will it be running inside Kubernetes or in some external environment (e.g. dedicated VM) ?
- If inside Kubernetes, in which cluster it should be located ?
- If replicated:
- Is there is a single write replica (master), or multiple ?
- How will data by synchronized and keep consistency between different replicas ?
- Is data synchronization done automatically by the DB ?
- If so, how to setup the appropriate configuration ?
- Is there a Kubernetes operator for the selected DB ? If so, does it provides any support for multi-cluster deployments ? (currently, there is limited support for this)
- Is custom application-level logic required to perform the data synchronization (e.g. by relaying data updates using a message broker).
- How are multi-cluster data backup orchestrated�?
For simplicity, in the following I assumed the simplest scenario where the sample app connects to a MySQL DB running in the same cluster, and each cluster and application deployment has its own DB. I leave open the important issue of data synchronization and consistency across DBs.
Furthermore, connecting to a DB in a separate cluster or external environment, is in principle similar to connecting to a DB in the same cluster, but may required some configuration adjustments. I will leave discussion of these more advanced scenarios for a future post.
a future post.
Tooling
You have several tooling options to install databases in Kubernetes clusters, including: Helm charts, kubectl with manifest files (plain or kustomized composed), DB specific operators and CRDs, and several UI based tools including Cloud Manager. Here I will continue using the ei CLI tool.
Command market is used to list and search marketplace solutions from configured catalogs. Cloud Manager default installation automatically setups several catalogs out-of-the-box. These catalogs define a rich variety of solutions including several databases. Below, I show how to search for all solutions whose name or keywords contain the text sql.
#list all solutions in any catalog matching a query
ei market sql
Installing the Database
To install MySQL DB I use the command install and select the mysql solution available in catalog named einnovator.
ei install einnovator/mysql
ei ps
ID    NAME         DISPLAYNAME   KIND          STATUS    AVAILABLE   DESIRED   READY   AGE
587   superheros   superheros    Deployment    Running   1           1         1/1     1d
589   mysql        MySql DB      StatefulSet   Running   1           1         1/1     8h
After starting the DB deployment (actually a StatefulSet), you shuold create the database for the app data. For this purpose, you can run command mysql in the pod of the DB and execute the command create database. This can be done easily with ei command deploy exec, which by default runs the command in the first pod of a deployment.
For the create database command to work, you need to lookup and provide the database password and authentication. For the solution we installed, this is setup in a secret named mysql-credentials and data field password. Below, I use the command secret get with options -d and --decode to extract and decode the password and assign it to a variable.
export PWD=`ei secret get mysql-credentials -d=password --decode`
ei deploy exec mysql -- mysql -uroot -p$PWD -e "create database superheros"
Alternatively, you can use kubectl plus util jq to extract the decoded secret value and create the database.
export PWD=`kubectl get secret mysql-credentials -o json | jq '.data|map_values(@base64d)'`
kubectl exec mysql-0 -- mysql -uroot -p$PWD -e "create database superheros"
Defining a Database Connector
To simplify the work of connection applications to backing services, such as DBs and messaging-brokers, and other microservices, Cloud Manager provides the abstractions of Connector and Binding. A deployment/service can expose one or more connectors, each defining a set of key-value pairs used to export connection information to applications. They are defined with a JSON specification, and include typically information such as: username/password credentials, service host/IP, and access URL.
Below, I use the command connector add to create a new connector for service mysql with name superheros/root. The option --spec provides a JSON specification for the connector. Here, exporting several variables, including: password looked up from secret mysql-credentials (syntax prefix ^^ resolves a secret data item, and prefix ^ resolves a configmap data item), username defined as root, and uri referring to variable ${host} (set automatically to the IP of the service endpoint) and database superheros. The option --type is an optional hint to allow auto-generation of binding specifications (see below).
ei connector add mysql superheros/root --type=mysql --spec='{\"password\":\"^^mysql-credentials.password\",\"username\":\"root\",\"uri\":\"mysql:${host}/superher
os\"}'
Because setting the connector spec with JSON from the command-line tends to be a bit cumbersome (as double-quotes need to be escaped), it is often preferred to use a comma-separated list of settings, as show below:
ei connector add mysql superheros/root --type=mysql --spec=password:^^mysql-credentials.password,username:root,uri:mysql://\${host}/superheros
Binding to a Database
A Binding is a collection of settings for environment variables whose value are resolved from a connector. The appropriate environment variables to set depend on the stack used to implement the application. Our sample app is implemented with Spring Boot and we are connecting to a MySQL DB, so we need to set environment variables SPRING_DATASOURCE_*.
Below, I use command binding add to create a new binding for the app superheros. The selector mysql/superheros/root specifies that we are binding to the connector named superheros/root of service mysql. The option --spec defines as JSON the collection of environment variables to set, which includes the JDBC URL, username and password. The values are resolved from the connector variables.
ei binding add superheros mysql/superheros/root --spec='{\"spring\":{\"datasource\":{\"url\":\"jdbc:${uri}\",\"username\":\"${username}\",\"pass
word\":\"${password}\"}}}'
A simplified approach is to ask for the binding specification be generated automatically by Cloud Manager based on the stack of the app and the service type. This is done by specifying the option --auto when creating the binding. Because we set the stack of the app at deployment time with option --stack=BOOT, and the connector type mysql was specified for the connector at creation time, Cloud Manager knows what appropariate spec to generate.
ei binding add superheros mysql/superheros/root --auto
ei restart
Once the app is restarted it will be running and fetching/storing data in the MySQL DB, rather than the embedded DB.
Complete Script
For reference, I show below the complete Bash script to install, configure, and connect to aMySQL DB across all clusters.
export SPACES="do/dev linode/dev scaleway/dev gcp/dev aws/dev azure/dev ibm/dev oracle/dev alibaba/dev"
for space in $SPACES ; do\
  ei cd ${space};\
  ei install einnovator/mysql; \
  ei connector add mysql superheros/root --type=mysql \
--spec=password:^^mysql-credentials.password,username:root,uri:mysql://\${host}/superheros
  ei binding add superheros mysql/superheros/root --auto
  ei deploy restart superheros
done
Summary
I gave an overview how to use Cloud Manager CLI tool to deploy application across multiple clusters, possibly from different cloud providers. The main benefits of the approach, include: uniformity across cloud providers, ability to deploy and make updates to multiple clusters with a simple scripts and the same abstractions as for a single cluster, use of the simplified configuration model of Cloud Manager — which is arguably much simpler than the vanilla configuration of Kubernetes (which require use of extensive YAML manifest files), and can be done incrementally.
Clearly, replicating the stateless part of applications is the easier part. Distributing and replicating stateful services, such as DBs, it is a problem on its own which often requires a service and use-case specific approach. General solutions that scale are often hard to come by. In this article, I focused on the simplest approach for illustration purposes, and let you the reader the task of investigate more advanced multi-cluster/multi-cloud data architectures appropriate for your applications and use case. On our side, we will continue to explore some of the options and return to this subject as well in future posts.

Comments and Discussion